RECENTLY CHECKED
All projects →
CAIBI ASSESSMENT

Tellaprompter

CAIBI VERDICTBUILD IT

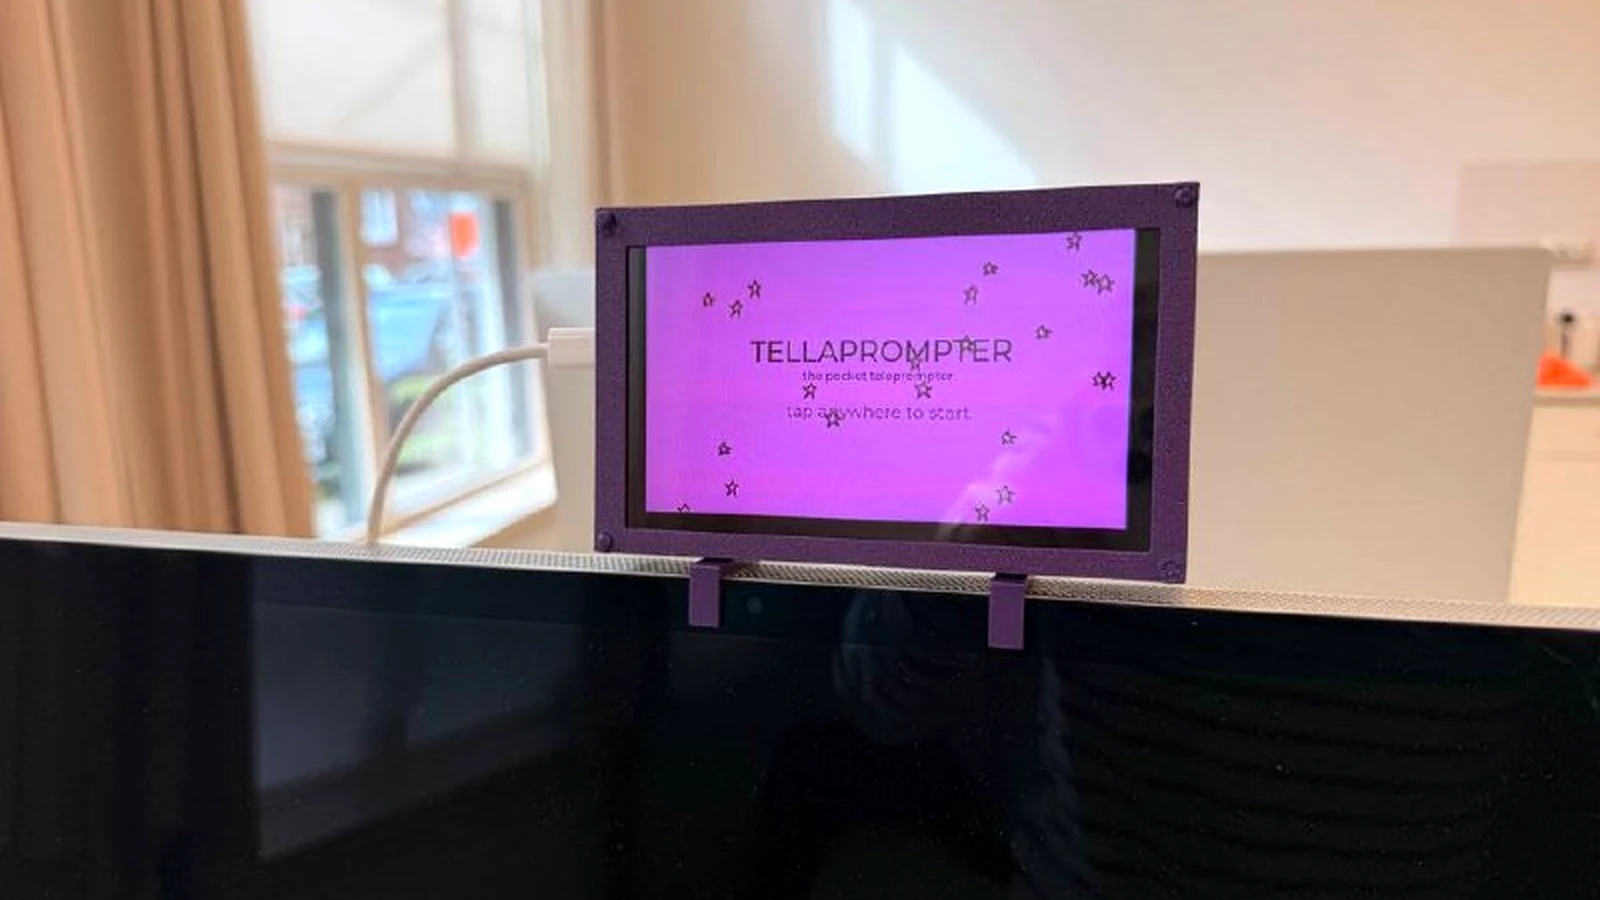
A compact ESP32 touchscreen teleprompter with touch speed control, a physical pause button and a printable monitor mount.

Build or buy?

Compare the documented build with the purchase reference.

Build it yourself

Build estimate£25–£35CAIBI estimate · medium confidenceOne controller/display; USB power required
Time
1.5 hours
Difficulty
3/5
Physical processes
ESP32 · 3D printer
See build requirements →

Purchase reference

Buy price referencePrice not checkedNo priced alternative recorded

Check the source for the exact model, availability and what is included.

Check comparison evidence →
Purchase comparison not yet priced
What the prices cover

Allowance for an ESP32 DevKit, ILI9341/XPT2046 touchscreen, push button, wiring and a simple printed monitor holder.

Includes: ESP32 DevKit; 2.8 inch touch display; Button/wiring; Small printed mount.

Not included: 3D printer ownership; USB power source; Shipping.

Build evidence recorded 4 Sep 2026. Currency conversions are approximate.

The project combines a small custom display and controller route. A generic teleprompter or monitor does not reproduce the same object closely enough for a savings claim.

BUILD AT A GLANCE

Source view and main parts

Check the source ↗
PHYSICAL BUILD5 key parts or groups
No.Source specification
01ESP32 DevKit v1
02ILI9341 240 × 320 SPI TFT touchscreen with XPT2046 touch controller
03Momentary push button
04Jumper wires and USB data connection
053D printed Tellaprompter mount from the published STL

Full source specifications
  1. ESP32 DevKit v1
  2. ILI9341 240 × 320 SPI TFT touchscreen with XPT2046 touch controller
  3. Momentary push button
  4. Jumper wires and USB data connection
  5. 3D printed Tellaprompter mount from the published STL
TOOLS / PROCESSES2 involved
  • ESP32
  • 3D printer
The real-world workYOU STILL HAVE TOThe real-world work
  • Wire the display and touch controller correctly
  • Print or fabricate the monitor mount
  • Calibrate the real touchscreen
  • Position the finished display so you can read it while looking toward the camera
THE BUILD SEQUENCE

How it comes together

1Preparation

  1. Prepare the ESP32 and display

    Use the published ESP32 DevKit v1 route and keep the build unpowered while wiring the shared SPI display and touch controller.

    YOU
  2. Wire the touchscreen

    Connect the display and touch signals to the published GPIO map, including shared MOSI, MISO and SCK plus separate chip-select, interrupt and backlight pins.

    YOU

2Build and assembly

  1. Add the pause button

    Wire the momentary button between GPIO21 and ground. The firmware uses the ESP32 internal pull-up so no extra resistor is required.

    YOU
  2. Deploy the starter firmware

    Flash the published sketch and libraries. AI is useful for changing script handling, text layout, controls or adding remote content later.

    AI + YOU

3Configure and test

  1. Calibrate touch and scrolling

    Check touch direction and offset, then adjust the four published touch calibration constants and scroll behaviour until the controls work reliably on the real screen.

    AI + YOU
  2. Print and mount the finished device

    Print the published holder or adapt it for your monitor and camera position, then verify that the text remains readable while recording.

    YOU

Benchmark this project

Use the Tellaprompter prompt. Compare what different models deliver, then add what happened when you tried it.

Try this benchmark
View the project prompt

CAIBI adaptation · Prompt 1.0 · Project source

Open and copy prompt →

Benchmark results 0

No reviewed results yet for Tellaprompter. Add the first result →

AI IN THIS PROJECT

Get AI help on this build

CAIBI · AI CAN HELP

AI can help with

  • Firmware changes
  • Script handling
  • Touch calibration help
  • Enclosure iteration
CAIBI · AI CAN'T DO

You still need to

  • Wire the display and touch controller correctly
  • Print or fabricate the monitor mount
  • Calibrate the real touchscreen
  • Position the finished display so you can read it while looking toward the camera
Original source AI use and prompts
SOURCEOriginal project AI use

The source is published as a Schematik hardware build and provides the resulting wiring, firmware, parts and assembly route. CAIBI has not yet found a source-published exact prompt for the original Tellaprompter build.

See it in the source ↗
CAIBI STARTING PROMPTS

Copy a prompt for this build

Each prompt tells AI to keep the original project source as the reference and to flag anything you must verify on the real build.

Ways to take it further
AFTER THE FIRST BUILD

Ways to take it further

Load scripts over Wi-FiBluetooth remote controlDifferent display sizesCustom monitor or camera mountsWeb based script editor
More routes and resources
OTHER WAYS TO GET THERE

You do not have to follow one route.

REVIEWED RESOURCES

Useful places beyond the main source

SOURCE · CAIBI · BUILDERS

What supports the verdict

SOURCESchematik

Schematik guide published 19 Jun 2026 with wiring, firmware, assembly steps and downloadable STL

Open source ↗
CAIBIBUILD IT

The electronics are simple enough to finish, but the result is still genuinely useful. AI can help change the script handling, controls and enclosure without replacing the physical build.

Evidence: Strong

Leave a build review
HAVE YOU MADE THIS?

Leave a build review.

First-hand evidence improves the assessment
What we want to know

What happened when you actually tried to make it.

  • Did it work?
  • Actual time and cost
  • What did you change?
  • What was harder than the source suggested?
  • Would you build it again?