RECENTLY CHECKED
All projects →
CAIBI ASSESSMENT

Overhead Flight Tracker

CAIBI VERDICTBUILD IT

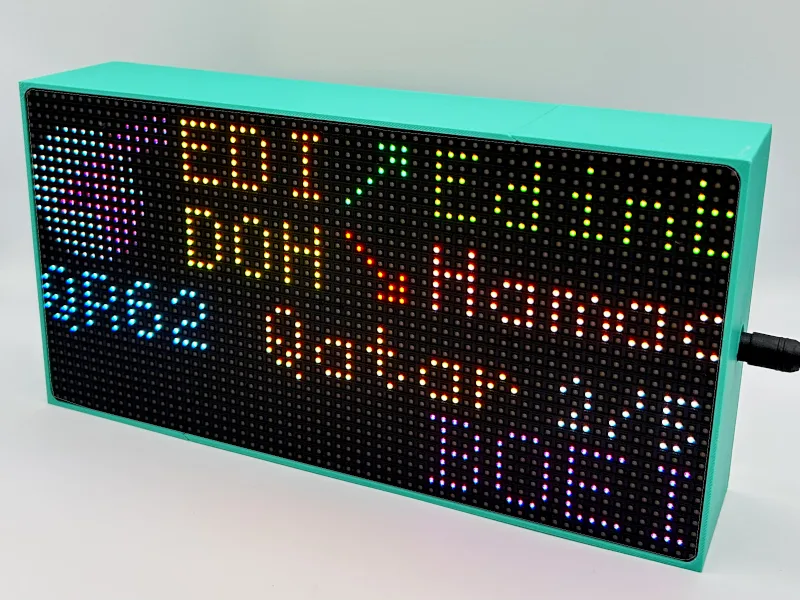
A Raspberry Pi drives a 64x32 HUB75 RGB LED matrix through an Adafruit RGB Matrix Bonnet to show the route, flight number and aircraft type of planes passing overhead, with a clock, weather and satellite passes when the sky is empty.

Build or buy?

Compare the documented build with the purchase reference.

Build it yourself

Build estimate£81–£130CAIBI estimate · medium confidenceCore parts only: Pi 3A+, Adafruit bonnet, 64x32 4 mm panel, certified 5 V 4 A plug-in supply, and a 32GB microSD at the high end. Excludes enclosure, diffuser, shipping, ADS-B receiver and paid APIs.
Time
Evening to weekend (CAIBI estimate)
Difficulty
2/5
Physical processes
Computer with microSD card reader · Small screwdriver · Soldering iron (optional, for the PWM solder bridge) · 3D printer or print service (optional, for the official case)
See build requirements →

Purchase reference

Buy price reference£306FlightTrackerLED Mach 2 LED Flight Tracker DisplayRecorded 24 Sep 2026

Check the source for the exact model, availability and what is included.

Check comparison evidence →
Build estimate is lower
What the prices cover

Sum of current retailer prices for the core parts. The UK low end uses a Waveshare 1:16-scan panel and assumes a microSD card is already owned; the high end uses the Adafruit panel and a new card. The US range uses Adafruit and PiShop.us prices; the low end assumes a card is owned. The UK supply is a Mean Well desktop unit plus a separate UK mains cable. Several US Raspberry Pi and microSD listings were out of stock on the check date.

Includes: Raspberry Pi 3 Model A+; Adafruit RGB Matrix Bonnet; 64x32 4 mm pitch HUB75 panel; Certified 5 V 4 A plug-in supply with 2.1 mm barrel; 32GB microSD card (high end only).

Not included: Enclosure or 3D printing; Diffusion acrylic; Shipping; Optional local ADS-B receiver; Any paid flight data API; Computer used for setup.

Build evidence recorded 24 Sep 2026. Currency conversions are approximate.

The FlightTrackerLED Mach 2 uses the same 64x32 panel format but runs on an ESP32-S3, comes in a solid maple enclosure and uses a managed cloud data service. The DIY estimate excludes an enclosure and shipping, and the bought prices exclude shipping; UK shipping and any import charges are calculated at checkout and were not checked. The UK price is the GBP storefront sale price (shown against a £422 compare-at price). The difference is parts cash only and does not price setup time or ongoing data-provider risk.

UK purchase/source reference ↗US purchase/source reference ↗GLOBAL purchase/source reference ↗
BUILD AT A GLANCE

Source view and main parts

Check the source ↗
PHYSICAL BUILD7 key parts or groups
No.Source specification
01Raspberry Pi (source lists Zero 2 W
02Adafruit RGB Matrix Bonnet for Raspberry Pi
0364x32 RGB LED matrix panel
04Certified external plug-in 5 V supply with 2.1 mm barrel plug (source lists 5 V 8 A
05microSD card
06Optional 3D-printed case (official design on Printables
07Optional tinted diffusion acrylic
Full source specifications
  1. Raspberry Pi (source lists Zero 2 W, 3B, 4B and 5 as tested; Pi 3A+ used by the c0wsaysmoo fork)
  2. Adafruit RGB Matrix Bonnet for Raspberry Pi
  3. 64x32 RGB LED matrix panel, HUB75, 1:16 scan (4 mm pitch is the common size; the source links Pimoroni's 32x64 4 mm panel)
  4. Certified external plug-in 5 V supply with 2.1 mm barrel plug (source lists 5 V 8 A; the fork uses 5 V 4 A)
  5. microSD card
  6. Optional 3D-printed case (official design on Printables, CC BY-NC 4.0) or a wooden box
  7. Optional tinted diffusion acrylic, heatsink, toggle switch and loading LED
TOOLS / PROCESSES4 involved
  • Computer with microSD card reader
  • Small screwdriver
  • Soldering iron (optional, for the PWM solder bridge)
  • 3D printer or print service (optional, for the official case)
The real-world workYOU STILL HAVE TOThe real-world work
  • Check the scan-rate marking on the physical panel
  • Seat the bonnet and connect the ribbon and power leads the right way round
  • Make the optional PWM solder bridge
  • Judge flicker, brightness and colour on the real display
  • Confirm the displayed flights match aircraft actually overhead
  • Secure the panel and cables in an enclosure
DATA ROUTES

Online services this build depends on

All data sources →
Used forServiceStatusAccess
Aircraft positionsUsed by default

Community aggregators, no key. Free, but not guaranteed services.

  • Not reviewed
  • Community service
  • Community service
  • Not reviewed by CAIBI
  • No key · ODbL open licence
  • No key stated · non-commercial
Aircraft positionsUsed by default

Reads the Flightradar24 website through an unofficial library rather than the official paid API. Its author limits it to personal educational use, and it can break without notice.

  • Unofficial
  • No key · personal educational use only
Route and aircraft lookupUsed by default

Free community lookups, no key.

  • Not reviewed
  • Community service
  • Not reviewed
  • Not reviewed by CAIBI
  • No key · no published terms
  • Not reviewed by CAIBI
Satellite passesUsed by default
  • Community service
  • No key · fetch at most every 2 hours
Aircraft positionsOptional

Your own receiver can be set as the first source, removing the dependence on outside services.

  • Your own hardware
  • Your own hardware · no account
Aircraft positionsOptional

Needs a free OpenSky account. OpenSky requires written permission for operational use in an automated system.

  • Official API
  • Free account (OAuth2) · 4,000 credits a day
Positions and routes, paidOptional

Official services with keys; off by default.

  • Official API
  • Official API
  • Not reviewed
  • Not reviewed
  • Paid · from US$9 a month
  • Free registration · US$5 of queries a month
  • Not reviewed by CAIBI
  • Not reviewed by CAIBI
Weather on the idle screenOptional

Off until a free WeatherAPI.com key is entered.

  • Not reviewed
  • Not reviewed by CAIBI

Alternatives the code does not use

  • Open-Meteo: Open-Meteo would avoid a weather key, but the code does not support it; switching needs changes to the weather service.
  • OpenWeatherMap One Call: The documentation site names OpenWeather, but the code calls WeatherAPI.com.

Read from the project code on 24 Sep 2026. Service terms change; check the provider before relying on one.

THE BUILD SEQUENCE

How it comes together

1Preparation

  1. Choose the data route first

    Decide whether the default free community and FlightRadar24 sources are enough, or whether to add a free OpenSky Network account or a local ADS-B receiver running tar1090. This decides which credentials you need and how the display behaves if a provider changes.

    AI + YOU
  2. Buy compatible hardware

    Buy a supported Pi, the Adafruit RGB Matrix Bonnet, a 64x32 HUB75 panel with a 1:16 scan rate, a certified plug-in 5 V barrel supply and a microSD card. Avoid panels marked 32S unless you accept extra configuration.

    AI + YOU
  3. Assemble the Pi, bonnet and panel

    Seat the bonnet on the Pi header, connect the HUB75 ribbon to the panel input and the panel power lead to the bonnet terminals, observing polarity. Optionally make the pin 4 to 18 PWM solder bridge on Pi 3, 4 and Zero builds.

    YOU

2Build and assembly

  1. Install the software

    Flash Raspberry Pi OS Lite or FlightTracker OS, then run the installer or follow the guide for your Pi model. The installer detects the hardware, sets up a Python environment and a systemd service.

    AI + YOU
  2. Configure location and providers

    In the web interface set the tracking zone, altitude limits, units, brightness schedule and provider order, and enter any API credentials. Set a password on the web interface.

    AI + YOU
  3. Fix display faults

    Adjust the GPIO slowdown for flicker, the scan-rate setting if only half the panel lights, and the colour order if colours are swapped. A red-tinted display points to an inadequate supply.

    AI + YOU

3Configure and test

  1. Enclose and mount

    Print the official case or build a box, add a diffuser if wanted, and secure the ribbon and power lead so nothing strains the connectors.

    YOU
  2. Check it against the real sky

    Compare what the display shows with aircraft you can see or a public flight map, then tune the zone and altitude limits for your location.

    YOU
AI IN THIS PROJECT

Get AI help on this build

CAIBI · AI CAN HELP

AI can help with

  • Explain the install script and the step-by-step guide for your Pi model before you run anything
  • Help choose between the default free sources, OpenSky Network and a local tar1090 receiver based on your needs and the providers' published limits
  • Work out the bounding box, radius and altitude filters for your location from coordinates you supply
  • Read error output and journalctl logs and suggest likely causes, with API keys removed first
  • Help adapt the display code, themes and scenes in the GPL-3.0 source
  • Check a panel listing for scan rate, HUB75 interface and power requirements before you buy
  • Draft an enclosure or mounting plan around measured panel and Pi dimensions
CAIBI · AI CAN'T DO

You still need to

  • Check the scan-rate marking on the physical panel
  • Seat the bonnet and connect the ribbon and power leads the right way round
  • Make the optional PWM solder bridge
  • Judge flicker, brightness and colour on the real display
  • Confirm the displayed flights match aircraft actually overhead
  • Secure the panel and cables in an enclosure
Original source AI use and prompts
SOURCEThe original project does not publish an AI prompt

The prompts below are CAIBI helpers for this build. They are not presented as instructions from the creator.

CAIBI STARTING PROMPTS

Copy a prompt for this build

Each prompt tells AI to keep the original project source as the reference and to flag anything you must verify on the real build.

Ways to take it further
AFTER THE FIRST BUILD

Ways to take it further

Raspberry Pi 5 route using Adafruit's Piomatter driverLocal ADS-B receiver (tar1090) as the data sourceOpenSky Network as the data sourcec0wsaysmoo fork with flight tracking by number, alerts and multi-clock syncSmaller 2.5 mm or 3 mm pitch 64x32 panel for a desk-sized unit
More routes and resources
OTHER WAYS TO GET THERE

You do not have to follow one route.

REVIEWED RESOURCES

Useful places beyond the main source

SOURCE · CAIBI · BUILDERS

What supports the verdict

SOURCEColin Waddell / FlightTracker

Active. The repository was created in July 2021 and had 203 stars and 55 forks on 24 Sep 2026. A major v2 rewrite landed in June 2026 on the main branch (v1 remains on master), with commits as recent as 20 Sep 2026. The documentation site flight-tracker.dev carries the hardware and install guides, including a Pi 5 route and a prebuilt FlightTracker OS image. Independent builds are documented: c0wsaysmoo's plane-tracker-rgb-pi (241 stars, last commit 27 Aug 2026) grew from the same project and was covered by Tom's Hardware in June 2023, and the Raspberry Pi Foundation covered the original build in February 2023.

Open source ↗
CAIBIBUILD IT

The build is mostly assembly and configuration, with no fabrication required unless you want a custom case. The software is open (GPL-3.0), configurable from a browser, and draws aircraft positions from several free sources at once, with a free OpenSky Network account, paid services or your own ADS-B receiver as options. The same hardware can be repurposed as any 64x32 LED display. The commodity parts cost well under half of a finished commercial tracker.

Evidence: Strong

Leave a build review
HAVE YOU MADE THIS?

Leave a build review.

First-hand evidence improves the assessment
What we want to know

What happened when you actually tried to make it.

  • Did it work?
  • Actual time and cost
  • What did you change?
  • What was harder than the source suggested?
  • Would you build it again?