RECENTLY CHECKED
All projects →
CAIBI ASSESSMENT

AWTRIX Pixel Clock

CAIBI VERDICTWORTH CONSIDERING

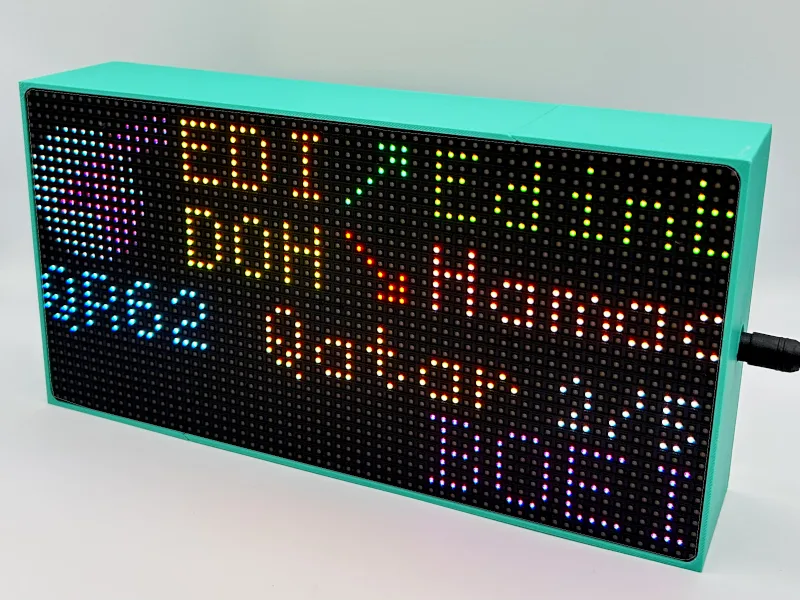
Open firmware that turns a 32x8 WS2812 pixel clock into a local notification and information display for Home Assistant, MQTT or HTTP. AWTRIX 3 was archived in August 2026; its author now directs every new install to the rewrite, AWTRIX NG, which runs on the same Ulanzi TC001 or on a self-built ESP32 and LED matrix.

Build or buy?

Compare the documented build with the purchase reference.

Build it yourself

Build estimate£50–£65CAIBI estimate · low confidenceScratch-build core parts only: ESP32 board, 8x32 WS2812B panel, certified plug-in 5 V 4 A supply, DC jack, resistor and capacitor allowance. Excludes enclosure, diffuser, optional sensors and buttons, battery and shipping. The UK panel price is an approximate conversion. The Ulanzi TC001 flash route costs £37 / $45.99 for the device.
Time
Under an hour to flash; weekend to scratch build (CAIBI estimate)
Difficulty
2/5
Physical processes
Computer with Chrome, Edge or Opera for the browser flasher · USB-C data cable · Python with esptool to back up the stock firmware · Soldering iron and multimeter (scratch build only) · 3D printer or print service (scratch build case, optional)
See build requirements →

Purchase reference

Buy price reference£37Ulanzi TC001 Smart Pixel Clock, 1 pc (flashed with AWTRIX NG)Recorded 24 Sep 2026

Check the source for the exact model, availability and what is included.

Check comparison evidence →
Purchase price is lower
What the prices cover

Scratch-build core parts from current retailer prices. The verified UK items total £36.70 at The Pi Hut. The UK panel price is an approximate conversion from BTF-Lighting USD prices because no UK retailer price could be verified, which is why confidence is low. The US figure uses Adafruit and BTF-Lighting prices plus a small capacitor allowance. None of this is needed on the bought route: a Ulanzi TC001 costs £37 / $45.99 at Ulanzi and the firmware is free.

Includes: ESP32 or ESP32-S3 development board; WS2812B 8x32 flexible panel; Certified plug-in 5 V 4 A supply (and UK mains lead); 2.1 mm DC jack; Series data resistor; 1000 µF capacitor and wire (allowance).

Not included: Enclosure or 3D printing; Diffuser acrylic; Optional buttons, light sensor, temperature sensor, buzzer and level shifter; Battery and charger; Shipping and any UK import charges on the panel; MQTT broker or Home Assistant host; Computer and USB cable.

Build evidence recorded 24 Sep 2026. Currency conversions are approximate.

The Ulanzi TC001 runs the same firmware and adds a case, diffuser, buttons, light and temperature sensors, a buzzer and a battery. The scratch-build estimate leaves all of those out and still costs more, so the comparison does not favour buying unfairly. Flashing the Ulanzi is free, which makes it the cheapest route in both markets. The UK Ulanzi price is Ulanzi's own GBP storefront price. The UK DIY figure depends on an approximate panel conversion. Shipping is excluded on both sides. For premium context, LaMetric TIME is £159 in the UK and $199.99 in the US. Tidbyt no longer sells new units; its store lists Gen 2 at $189 and the original at $199, both unavailable.

UK purchase/source reference ↗US purchase/source reference ↗UK purchase/source reference ↗US purchase/source reference ↗US purchase/source reference ↗
BUILD AT A GLANCE

Source view and main parts

Check the source ↗
PHYSICAL BUILD9 key parts or groups
No.Source specification
01Route A
02Route A
03Route B
04Route B
05Route B
06Route B
07Route B
08Route B optional
09Route B optional
Full source specifications
  1. Route A: Ulanzi TC001 Smart Pixel Clock (ESP32, 4 MB flash, 256 LEDs, 4400mAh cell, buttons, light and temperature sensors, buzzer)
  2. Route A: USB-C data cable and a plain 5 V USB supply (Ulanzi recommends 5 V / 1 A for charging)
  3. Route B: ESP32 or ESP32-S3 development board (NG docs recommend an ESP32-S3 DevKitC-1 N16R8)
  4. Route B: WS2812B 8x32 flexible LED panel (SK6812 also works; APA102 and SK9822 do not)
  5. Route B: certified plug-in 5 V supply, 3–4 A for a 32x8 panel according to the NG docs
  6. Route B: 1000 µF 6.3 V+ electrolytic capacitor and a 330–470 ohm data resistor
  7. Route B: diffuser (2–3 mm milky acrylic or a printed grid with paper)
  8. Route B optional: three push buttons, GL5528 LDR and 10 k resistor, BME280 or SHT31 sensor, piezo buzzer, 74AHCT125 level shifter
  9. Route B optional: protected Li-ion cell with TP4056 charger and 2 x 100 k divider for battery operation
TOOLS / PROCESSES5 involved
  • Computer with Chrome, Edge or Opera for the browser flasher
  • USB-C data cable
  • Python with esptool to back up the stock firmware
  • Soldering iron and multimeter (scratch build only)
  • 3D printer or print service (scratch build case, optional)
The real-world workYOU STILL HAVE TOThe real-world work
  • Plug the device in and hold the right buttons while flashing
  • Solder the panel power, ground, capacitor and data resistor on a scratch build
  • Judge whether the Ulanzi internal cell is swollen, and remove it safely if needed
  • Fit the diffuser and enclosure so the text reads cleanly
  • Watch a bright full-white frame and confirm the supply and wiring stay cool
DATA ROUTES

Online services this build depends on

All data sources →

Notes on data

  • Open-Meteo: The clock needs no online service; other data is pushed to it over HTTP or MQTT, usually from Home Assistant. AWTRIX NG scripts can also fetch data directly, and its documented weather example uses Open-Meteo.

Read from the AWTRIX NG documentation on 24 Sep 2026. Service terms change; check the provider before relying on one.

THE BUILD SEQUENCE

How it comes together

1Preparation

  1. Choose the route and the firmware

    For a new install, use AWTRIX NG, not AWTRIX 3. Decide between flashing a Ulanzi TC001 and building from an ESP32 and a WS2812B panel. The Ulanzi is cheaper than the parts for a scratch build and includes the case and sensors.

    AI + YOU
  2. Back up the stock firmware

    Read the full 4 MB flash with esptool before writing anything. The source says a file shorter than 4,194,304 bytes is a failed read, not a backup. The backup is the only way back to Ulanzi firmware.

    YOU
  3. Flash from the browser

    Use the NG browser flasher in Chrome, Edge or Opera with a USB data cable. It detects the chip and flash size. A fresh install clears everything and the device comes up as its own access point for Wi-Fi setup.

    YOU

2Build and assembly

  1. Scratch build: wire power before data

    Feed the panel directly from a certified plug-in 5 V supply, never through the dev board. Join the grounds, fit the 1000 µF capacitor at the panel input and the series resistor on the data line. Cap brightness, because the firmware does not limit LED current.

    YOU
  2. Scratch build: set the pin map and panel

    Enter the pins, panel width and colour order in the web UI or over the API, then reboot. The source says a bad map falls back to defaults rather than bricking the board. Work through the published verification table.

    AI + YOU
  3. Connect to Home Assistant

    Point the device at an MQTT broker and enable discovery. NG needs Home Assistant 2024.11 or newer. Check that the device appears under the MQTT integration.

    AI + YOU

3Configure and test

  1. Build the apps and notifications

    Push apps and notifications from Home Assistant, Node-RED or scripts over MQTT or HTTP, or write Berry scripts that run on the clock. AI can draft these from the published API and scripting guide.

    AI
  2. Deal with power and the battery

    On the Ulanzi, use a plain 5 V supply rather than a fast charger, and decide whether to keep the always-charged internal cell. On a scratch build, confirm the supply stays cool and the board does not reset on bright frames.

    YOU
AI IN THIS PROJECT

Get AI help on this build

CAIBI · AI CAN HELP

AI can help with

  • Explain the difference between AWTRIX 3 and AWTRIX NG and which documentation applies to a given device
  • Walk through the esptool backup and browser flashing steps and interpret error messages
  • Write Home Assistant automations and MQTT or HTTP payloads that push apps and notifications to the display
  • Write and debug Berry scripts for on-device apps, using the AI prompt and agent skill the NG project publishes
  • Port existing AWTRIX 3 automations to the NG API v1 from the published migration guide
  • Check a scratch-build pin map against the published GPIO rules before it is written to the device
  • Size a supply and a brightness cap for a chosen panel from the current figures in the documentation
CAIBI · AI CAN'T DO

You still need to

  • Plug the device in and hold the right buttons while flashing
  • Solder the panel power, ground, capacitor and data resistor on a scratch build
  • Judge whether the Ulanzi internal cell is swollen, and remove it safely if needed
  • Fit the diffuser and enclosure so the text reads cleanly
  • Watch a bright full-white frame and confirm the supply and wiring stay cool
Original source AI use and prompts
SOURCEThe original project does not publish an AI prompt

The prompts below are CAIBI helpers for this build. They are not presented as instructions from the creator.

CAIBI STARTING PROMPTS

Copy a prompt for this build

Each prompt tells AI to keep the original project source as the reference and to flag anything you must verify on the real build.

Ways to take it further
AFTER THE FIRST BUILD

Ways to take it further

Flash a Ulanzi TC001 with AWTRIX NG (recommended starting point)Keep an existing AWTRIX 3 device running unchanged, with no further fixesScratch build on a classic ESP32 with a 32x8 WS2812B panelScratch build on an ESP32-S3 with PSRAM for MP3 and internet radioWider panels up to 128x8 on NGConvert an old AWTRIX 2 mainboard
More routes and resources
OTHER WAYS TO GET THERE

You do not have to follow one route.

REVIEWED RESOURCES

Useful places beyond the main source

GITHUB REPOAWTRIX 3 (archived)

Original firmware. Archived in August 2026, last release 0.98 in January 2025, CC BY-NC-SA 4.0. Still the reference for devices already running it.

GITHUB REPOAWTRIX NG

Current successor by the same author. Rewritten from scratch, PolyForm Noncommercial 1.0.0, v1.1.2 tagged 20 Sep 2026. Supports ESP32 and ESP32-S3 and panels from 32 to 128 pixels wide.

GITHUB REPOTronbyt server

Community self-hosted backend and firmware route that keeps Tidbyt Gen 1 and Gen 2 units working without Tidbyt servers. Commits to 22 Sep 2026.

DOCSAWTRIX NG documentation

Current documentation for flashing, the API, scripting and hardware.

DOCSAWTRIX NG DIY build guide

Bill of materials, pinouts, power sizing, wiring rules and a verification and troubleshooting table for scratch builds.

DOCSAWTRIX NG flashing guide

Browser flasher, esptool backup of TC001 stock firmware and image selection.

DOCSAWTRIX NG Home Assistant guide

MQTT discovery setup. Requires Home Assistant 2024.11 or newer.

DOCSAWTRIX 3 documentation (archived)

Kept online as a reference for AWTRIX 3 devices. Carries the end-of-maintenance notice.

DOCSDIY 8x32 LED Matrix Smart Clock With Awtrix 3.0

Independent scratch build with a printed enclosure, also published on Hackster.

DOCSDIY Social Media Follower Display (Awtrix)

Independent 2025 build on AWTRIX 3 with touch switches, sensor and printed housing.

VIDEOHow to Remove Battery from Ulanzi TC001 Clock

Community video on removing the internal cell. CAIBI has not verified the procedure.

SOURCE · CAIBI · BUILDERS

What supports the verdict

SOURCEStephan Mühl (Blueforcer)

AWTRIX 3 is archived. Its last tagged release, 0.98, dates from 5 January 2025. The README was changed on 8 August 2026 to state that AWTRIX 3 is no longer maintained, and the documentation was repointed to AWTRIX NG on 20 September 2026. The firmware keeps working on existing devices but receives no fixes. AWTRIX NG (github.com/Blueforcer/awtrix-ng) is the maintained successor by the same author. Its first commit was on 3 August 2026, v1.1.2 was tagged on 20 September 2026, and commits continue to that date. Evidence is Strong for AWTRIX 3 on both routes: thousands of TC001 users, a Discord of over 5,000 people according to the source, and independent scratch builds on Instructables, Hackster and Hackaday.io. Evidence for NG specifically is still thin because it is new. CAIBI could not read repository star counts on the check date.

Open source ↗
CAIBIWORTH CONSIDERING

A 32x8 pixel clock with open firmware becomes a glanceable local display for a smart home: the time, sensor readings, notifications from doorbells or washing machines, and small apps pushed over MQTT or HTTP, with no cloud and no telemetry according to the source. Home Assistant finds it through MQTT discovery. AWTRIX NG adds scripts that run on the clock itself, so a display can fetch and show data without a server. The flash route costs little more than a stock clock and a fraction of a LaMetric TIME. Tidbyt no longer sells hardware.

Evidence: Strong

Leave a build review
HAVE YOU MADE THIS?

Leave a build review.

First-hand evidence improves the assessment
What we want to know

What happened when you actually tried to make it.

  • Did it work?
  • Actual time and cost
  • What did you change?
  • What was harder than the source suggested?
  • Would you build it again?