RECENTLY CHECKED
All projects →
CAIBI ASSESSMENT

OpenBot DIY

CAIBI VERDICTBUILD IT

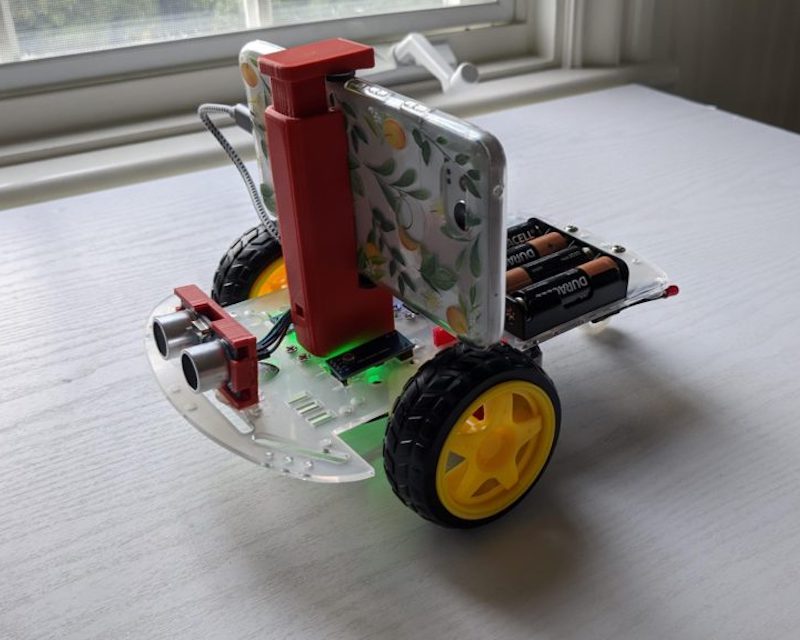
An open wheeled robot that reuses a smartphone for camera, compute and higher-level robotics while an Arduino Nano or ESP32 handles the motors and low-level sensors.

Build or buy?

Compare the documented build with the purchase reference.

Build it yourself

Known parts cost£37Build total not establishedRobot body only; smartphone, printing and charging extra
Time
Not published. Treat printing, electronics assembly, firmware/app setup and physical testing as separate stages rather than a single quick build.
Difficulty
3/5
Physical processes
3D printer or print service · Soldering and electronics tools · Android smartphone · Computer for firmware and app setup
See build requirements →

Purchase reference

Buy price referencePrice not checkedOpenBot RTR-TT / RTR-520

Check the source for the exact model, availability and what is included.

Check comparison evidence →
Purchase comparison not yet priced
What the prices cover

The current OpenBot repository and project site still describe the DIY robot body as about $50. A third-party BOM with component links checked on 31 Aug 2026 estimates roughly $50 to $80. CAIBI uses the source headline as a baseline and not as a guaranteed all-in first-build total.

Includes: Core low-cost wheeled robot-body hardware represented by the source headline; Arduino Nano or supported microcontroller bridge, motors and simple drive electronics in the selected DIY route.

Not included: Android smartphone; 3D printer or print service and filament; Battery charging equipment and shipping; Optional sensors, custom PCB route and upgrades; Controller hardware where separately required; Assembly, software setup and policy-training time.

Build evidence recorded 5 Sep 2026. Currency conversions are approximate.

The current OpenBot body documentation links ready-to-run RTR-TT and RTR-520 products on Amazon. The DIY route still carries an about $50 robot-body headline and a current third-party BOM estimate of $50 to $80, but it also assumes a suitable smartphone and fabrication access. Without a verified current regional RTR price and matched inclusions, CAIBI treats the routes as not like-for-like and does not publish a saving.

GLOBAL purchase/source reference ↗GLOBAL purchase/source reference ↗
BUILD AT A GLANCE

Source view and main parts

Check the source ↗
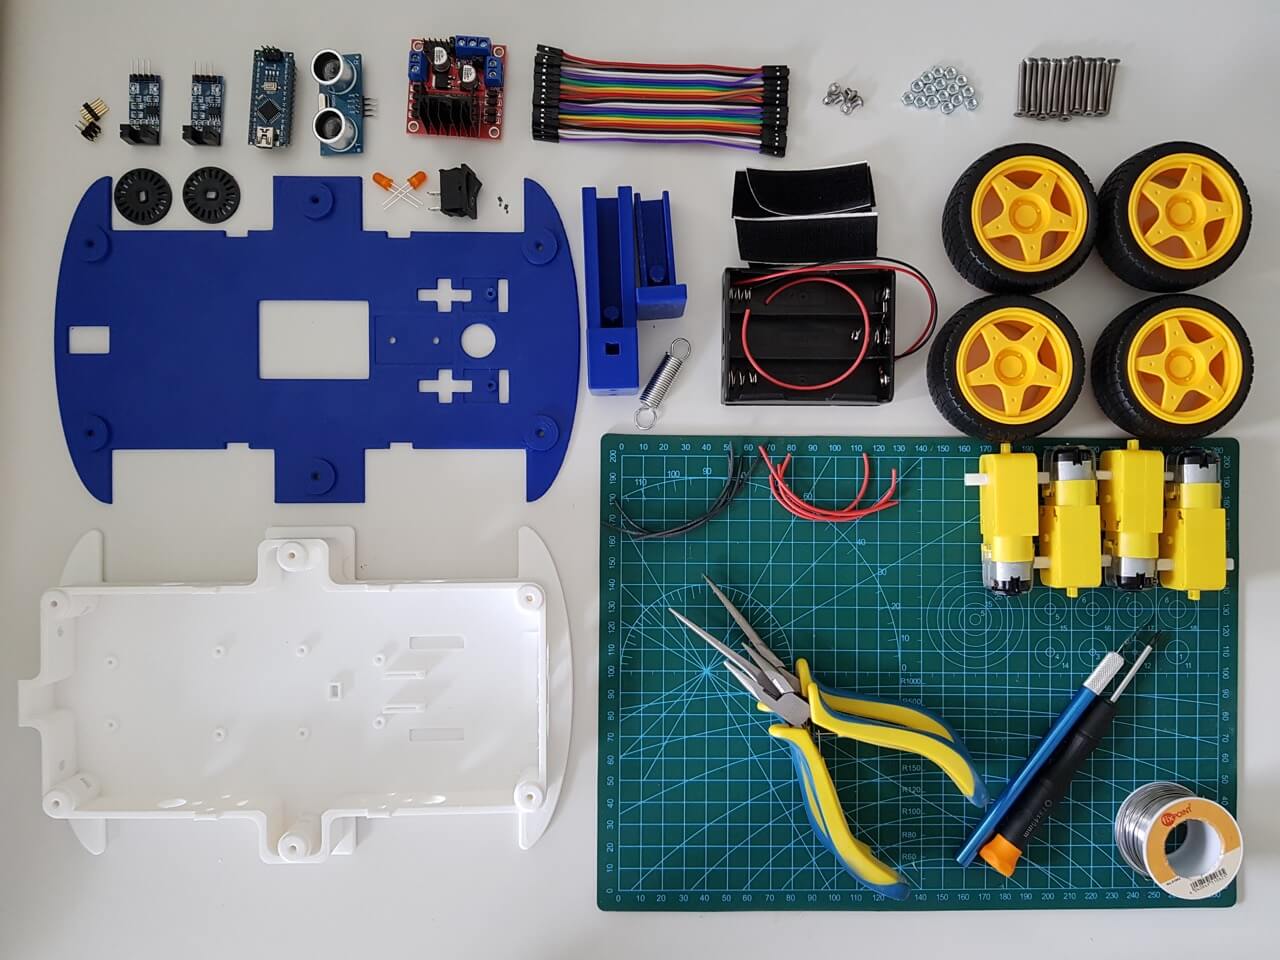
OpenBot DIY components from the official build guideOpenBot DIY components from the official build guide · OpenBot contributors ↗
PHYSICAL BUILD9 key parts or groups
No.Source specification
01Arduino Nano or supported ESP32 development board as the low-level robot controller
02Four TT gear motors with wheels for the standard DIY body
03L298N motor driver for the simple DIY electronics route or the project custom PCB route
04Three 18650 cells and a three-cell holder for the standard DIY body
05USB OTG cable matched to the smartphone connection
06Printed robot body and adjustable phone mount or a compatible alternative chassis
07M3 fasteners
08Optional wheel-speed sensors
09Android smartphone for the main documented app and vision route
Full source specifications
  1. Arduino Nano or supported ESP32 development board as the low-level robot controller
  2. Four TT gear motors with wheels for the standard DIY body
  3. L298N motor driver for the simple DIY electronics route or the project custom PCB route
  4. Three 18650 cells and a three-cell holder for the standard DIY body
  5. USB OTG cable matched to the smartphone connection
  6. Printed robot body and adjustable phone mount or a compatible alternative chassis
  7. M3 fasteners, Dupont wiring and small mechanical hardware
  8. Optional wheel-speed sensors, ultrasonic sensor, indicators, switch and OLED display
  9. Android smartphone for the main documented app and vision route
TOOLS / PROCESSES4 involved
  • 3D printer or print service
  • Soldering and electronics tools
  • Android smartphone
  • Computer for firmware and app setup
The real-world workYOU STILL HAVE TOThe real-world work
  • Choose a body variant that fits the available printer, phone and intended terrain
  • Print or fabricate the chassis and phone mount, or use a compatible alternative robot-car chassis
  • Source quality 18650 cells and use an appropriate charging and handling route
  • Solder and wire the motors, motor driver or PCB, microcontroller, battery and selected sensors
  • Secure the phone so it cannot leave the mount during acceleration, impacts or turns
  • Flash the exact hardware profile and prove steering, stopping and sensor directions at low consequence
  • Test remote and autonomous behaviour in a clear controlled area before increasing speed or complexity
  • Treat learned or vision-based behaviour as fallible and remain responsible for people, pets, property and the robot around it
THE BUILD SEQUENCE

How it comes together

1Preparation

  1. Pick the exact OpenBot route

    Choose the standard DIY body, smaller Lite body, RC-truck conversion, multi-terrain vehicle or another supported chassis. Do this before ordering because the mechanics, firmware profile and some electronics differ.

    AI + YOU
  2. Print or prepare the chassis

    Use the source body that fits the available build plate, or start from a compatible robot-car chassis. Print the phone mount as part of the system rather than treating the phone as a loose accessory.

    YOU
  3. Build the drive electronics

    Wire the motors and L298N DIY route or build the custom-PCB route, then add the battery holder and only the sensors required for the chosen build. Keep polarity and hardware-profile differences explicit.

    YOU

2Build and assembly

  1. Inspect power and phone retention

    Use sound 18650 cells, an appropriate charging route and insulated wiring. Verify that the battery and phone cannot shift into moving parts or leave the chassis before powering the wheels.

    YOU
  2. Flash the correct low-level firmware

    Select the exact OpenBot hardware configuration in the source firmware, then prove motor direction, stopping, wheel-sensor direction and optional ultrasonic behaviour before connecting higher-level autonomy.

    AI + YOU
  3. Set up the phone software

    Install the supported app route and establish the phone-to-microcontroller connection. Confirm camera framing and physical phone angle because poor framing directly reduces what the vision system can use.

    AI + YOU

3Configure and test

  1. Prove manual control first

    Drive at low speed in a clear area and verify steering, braking, battery readings and any fitted sensors. Fix mechanical pull, reversed motors, loose wiring and wheel-slip problems before testing learned behaviour.

    YOU
  2. Add autonomy as an experiment

    Only after manual control is predictable should you try person following, navigation, Playground behaviours or a trained driving policy. Record failures and keep a human able to stop the robot because perception and learned control can be wrong.

    AI + YOU

Benchmark this project

Use the OpenBot DIY prompt. Compare what different models deliver, then add what happened when you tried it.

Try this benchmark
View the project prompt

CAIBI adaptation · Prompt 1.0 · Project source

Open and copy prompt →

Benchmark results 0

No reviewed results yet for OpenBot DIY. Add the first result →

AI IN THIS PROJECT

Get AI help on this build

CAIBI · AI CAN HELP

AI can help with

  • Navigate the current DIY, Lite, RC-truck, multi-terrain and ready-to-run source routes
  • Map the BOM to the selected body and DIY or custom-PCB electronics route
  • Explain Arduino Nano and ESP32 firmware configuration without mixing hardware profiles
  • Help diagnose USB OTG, serial, motor-direction, sensor and GPIO problems from observed behaviour
  • Adapt firmware, controller or app code for custom controls and sensors
  • Help plan Playground behaviours, data collection and policy-training experiments
  • Review logs and test results while keeping physical safety checks with the builder
CAIBI · AI CAN'T DO

You still need to

  • Choose a body variant that fits the available printer, phone and intended terrain
  • Print or fabricate the chassis and phone mount, or use a compatible alternative robot-car chassis
  • Source quality 18650 cells and use an appropriate charging and handling route
  • Solder and wire the motors, motor driver or PCB, microcontroller, battery and selected sensors
  • Secure the phone so it cannot leave the mount during acceleration, impacts or turns
  • Flash the exact hardware profile and prove steering, stopping and sensor directions at low consequence
  • Test remote and autonomous behaviour in a clear controlled area before increasing speed or complexity
  • Treat learned or vision-based behaviour as fallible and remain responsible for people, pets, property and the robot around it
Original source AI use and prompts
SOURCEThe original project does not publish an AI prompt

The prompts below are CAIBI helpers for this build. They are not presented as instructions from the creator.

CAIBI STARTING PROMPTS

Copy a prompt for this build

Each prompt tells AI to keep the original project source as the reference and to flag anything you must verify on the real build.

Ways to take it further
AFTER THE FIRST BUILD

Ways to take it further

Standard OpenBot DIYOpenBot Lite education bodyRC-truck conversionMulti-Terrain VehicleCustom PCB electronicsDIY L298N electronicsReady-to-run RTR-TT / RTR-520 source route
More routes and resources
OTHER WAYS TO GET THERE

You do not have to follow one route.

REVIEWED RESOURCES

Useful places beyond the main source

SOURCE · CAIBI · BUILDERS

What supports the verdict

SOURCEOpenBot Foundation

OpenBot is current. The canonical project now lives at ob-f/OpenBot, is not archived and was pushed on 26 Aug 2026. The current source still maintains DIY, Lite, RC-truck, multi-terrain and ready-to-run body routes plus firmware, mobile apps, control and policy tooling. CAIBI retains the older 2021 paper as foundational evidence while using the current repository and 2026 BOM checks for lifecycle and cost context.

Open source ↗
CAIBIBUILD IT

OpenBot makes unusually good use of hardware many people already own. The phone supplies a camera, IMU, compute, display and network connection, while the robot body stays comparatively cheap and understandable. The source is still active in 2026, supports several body variants and exposes the full stack from motor firmware through higher-level autonomy. It is strongest as an education, experimentation and custom-robot platform rather than as a polished domestic appliance.

Evidence: Strong

Leave a build review
HAVE YOU MADE THIS?

Leave a build review.

First-hand evidence improves the assessment
What we want to know

What happened when you actually tried to make it.

  • Did it work?
  • Actual time and cost
  • What did you change?
  • What was harder than the source suggested?
  • Would you build it again?