RECENTLY CHECKED
All projects →
CAIBI ASSESSMENT

ESP32 Air Quality Monitor

CAIBI VERDICTBUILD IT

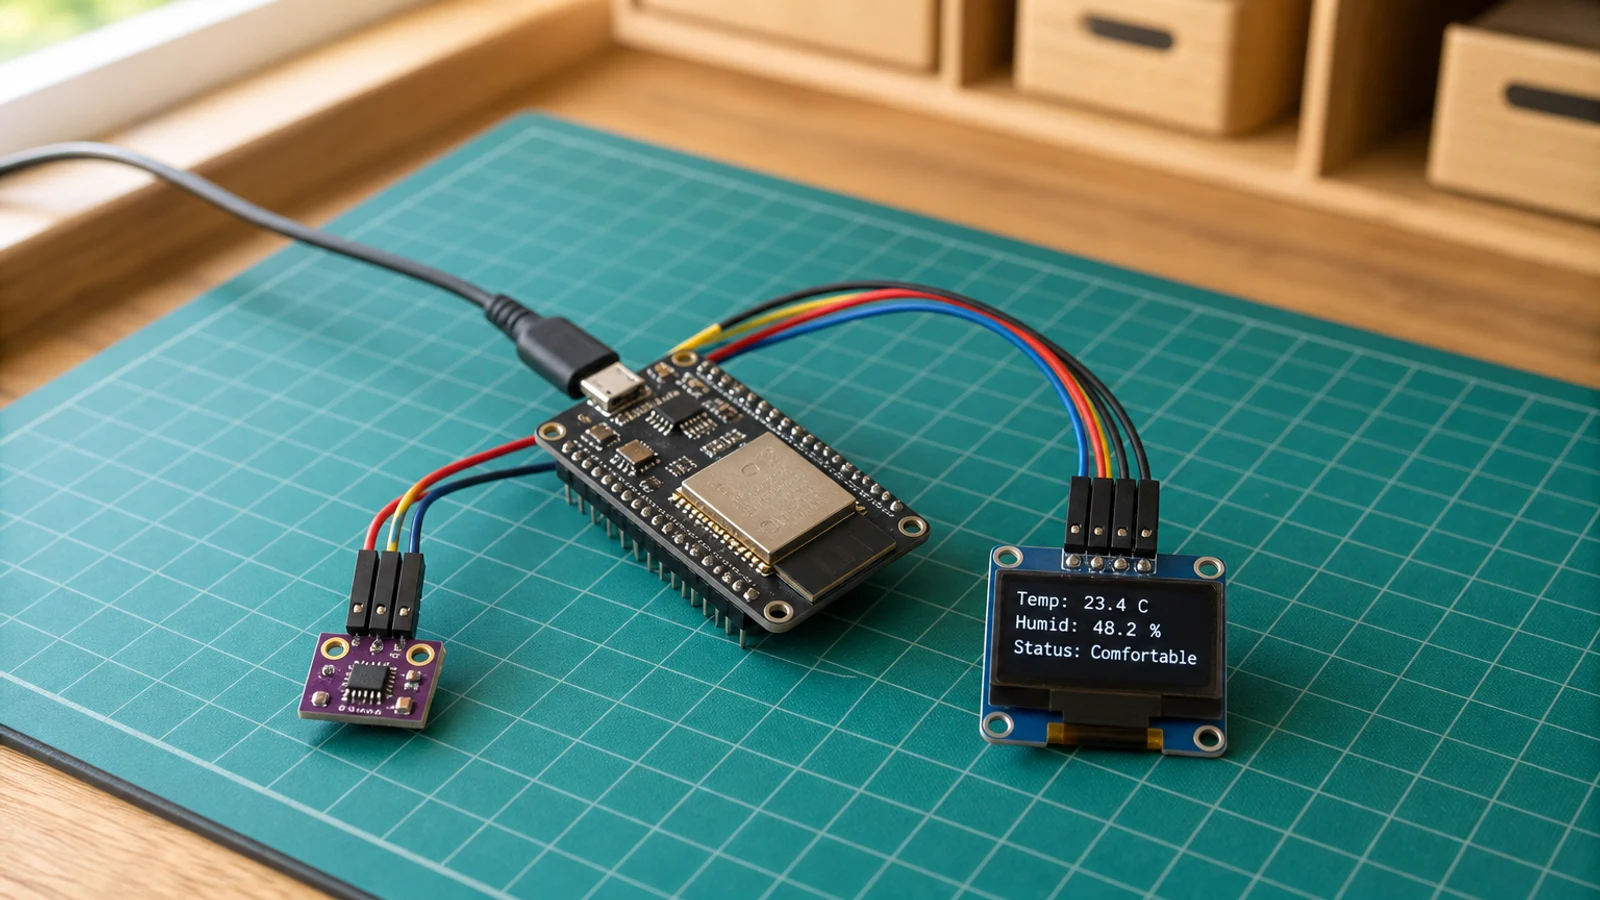
A small ESP32 instrument showing temperature, humidity, pressure and a comfort label on an OLED display.

Build or buy?

Compare the documented build with the purchase reference.

Build it yourself

Known parts cost£30–£45Build total not establishedSensor and electronics; enclosure extra
Time
25 minutes
Difficulty
2/5
Physical processes
ESP32 · Measurement & testing
See build requirements →

Purchase reference

Buy price referencePrice not checkedNo priced alternative recorded

Check the source for the exact model, availability and what is included.

Check comparison evidence →
Purchase comparison not yet priced
What the prices cover

Allowance for the source-specified ESP32, BME280 and SSD1306 OLED plus breadboard/jumper hardware.

Includes: ESP32 board; BME280 sensor; SSD1306 OLED; Basic wiring/breadboard.

Not included: Enclosure; Shipping; Cloud logging additions.

Build evidence recorded 4 Sep 2026. Currency conversions are approximate.

The published build uses a BME280 and OLED, so its sensing scope is narrower than products that measure PM2.5, CO2 or VOCs. A headline saving would overstate what the build replaces.

BUILD AT A GLANCE

Source view and main parts

Check the source ↗
PHYSICAL BUILD5 key parts or groups
No.Source specification
01ESP32 development board
02BME280 temperature
03SSD1306 128 × 64 I2C OLED display
04Breadboard and jumper wires
05USB power and flashing connection
Full source specifications
  1. ESP32 development board
  2. BME280 temperature, humidity and pressure sensor
  3. SSD1306 128 × 64 I2C OLED display
  4. Breadboard and jumper wires
  5. USB power and flashing connection
TOOLS / PROCESSES2 involved
  • ESP32
  • Measurement & testing
The real-world workYOU STILL HAVE TOThe real-world work
  • Place the sensor where heat and poor airflow do not bias the reading
  • Wire and power the I2C devices correctly
  • Check the displayed values against real room conditions
  • Design a ventilated enclosure that does not compromise the measurement
THE BUILD SEQUENCE

How it comes together

1Preparation

  1. Wire the shared I2C bus

    Connect both BME280 and OLED to GPIO21 SDA and GPIO22 SCL with 3.3 V power and common ground.

    YOU
  2. Place the sensor properly

    Keep the BME280 away from the ESP32 regulator and display heat, and leave airflow around it. Physical placement directly affects the reading.

    YOU

2Build and assembly

  1. Flash the published firmware

    Install the Adafruit display, graphics, BME280 and sensor libraries, then deploy the baseline sketch.

    AI + YOU
  2. Verify addresses and readings

    Confirm the OLED and BME280 I2C addresses, then compare live values with expected room conditions and Serial Monitor output.

    YOU

3Configure and test

  1. Tune the comfort logic

    Adjust the temperature and humidity thresholds for the room and climate. AI can help reshape the logic or add more informative states.

    AI + YOU
  2. Extend it if useful

    Add Wi-Fi logging, an RGB status light, Home Assistant output or trend storage after the baseline sensor readings are stable.

    AI + YOU

Benchmark this project

Use the ESP32 Air Quality Monitor prompt. Compare what different models deliver, then add what happened when you tried it.

Try this benchmark
View the project prompt

CAIBI adaptation · Prompt 1.0 · Project source

Open and copy prompt →

Benchmark results 0

No reviewed results yet for ESP32 Air Quality Monitor. Add the first result →

AI IN THIS PROJECT

Get AI help on this build

CAIBI · AI CAN HELP

AI can help with

  • Firmware changes
  • Threshold logic
  • Wi-Fi expansion
  • Troubleshooting
CAIBI · AI CAN'T DO

You still need to

  • Place the sensor where heat and poor airflow do not bias the reading
  • Wire and power the I2C devices correctly
  • Check the displayed values against real room conditions
  • Design a ventilated enclosure that does not compromise the measurement
Original source AI use and prompts
SOURCEThe original project does not publish an AI prompt

The prompts below are CAIBI helpers for this build. They are not presented as instructions from the creator.

CAIBI STARTING PROMPTS

Copy a prompt for this build

Each prompt tells AI to keep the original project source as the reference and to flag anything you must verify on the real build.

Ways to take it further
AFTER THE FIRST BUILD

Ways to take it further

Wi-Fi dashboardHome Assistant integrationRGB comfort indicatorSD card loggingDifferent enclosure and sensor placement
More routes and resources
OTHER WAYS TO GET THERE

You do not have to follow one route.

REVIEWED RESOURCES

Useful places beyond the main source

SOURCE · CAIBI · BUILDERS

What supports the verdict

SOURCESchematik

Schematik guide published May 2026 and updated Jul 2026 with full wiring, firmware and troubleshooting

Open source ↗
CAIBIBUILD IT

It is a low-risk first sensor build with a useful result and obvious expansion routes into logging, Wi-Fi, automation and more visible indicators.

Evidence: Strong

Leave a build review
HAVE YOU MADE THIS?

Leave a build review.

First-hand evidence improves the assessment
What we want to know

What happened when you actually tried to make it.

  • Did it work?
  • Actual time and cost
  • What did you change?
  • What was harder than the source suggested?
  • Would you build it again?